
自動產生程式碼
-
下載接案環境快速生成器 https://github.com/teed7334-restore/laravel-startup
-
新增一個本教學所需之資料庫與使用者
database: course
username: course
password: course-
將資料庫設定寫入web/.env中
-
按接案環境快速生成器之說明文件,生成前台與後台
-
於./web底下新增一個draft.yaml檔案
models:
  News:
    author: string:50
    title: string:50
    content: text

controllers:
  News:
    index:
      query: order:created_at:DESC limit:10
      render: news.index with:news

    add:
      render: news.add

    insert:
      validate: author, title, content
      save: news
      flash: news.id
      redirect: news.index

    detail:
      render: news.detail with:news

    edit:
      render: news.edit with:edit

    update:
      validate: news
      update: news
      flash: news.id
      redirect: news.index

    delete:
      delete: news
redirect: news.index- 透過Blueprint生成相關程式碼
php artisan blueprint:build draft.yaml- 確認產生的各檔案
Created:
- database/migrations/2020_05_11_160107_create_news_table.php
- app/News.php
- database/factories/NewsFactory.php
- app/Http/Controllers/NewsController.php
- app/Http/Requests/NewsInsertRequest.php
- app/Http/Requests/NewsUpdateRequest.php
- resources/views/news/index.blade.php
- resources/views/news/add.blade.php
- resources/views/news/detail.blade.php
- resources/views/news/edit.blade.php
- tests/Feature/Http/Controllers/NewsControllerTest.php

Updated:
- routes/web.php-
Blueprint 官方文件 https://blueprint.laravelshift.com/docs/getting-started/
-
程式碼生成器雖然可以在新增時加速開發,但是過多的程式碼也會造成管理上的問題,所以在維護上面,我們要多運用好比Trait與Interface,來達到元件重複利用與組合使用的目的,好比我們可以參考Laravel的註冊流程
<?php

namespace App\Http\Controllers\Auth;

use App\Http\Controllers\Controller;
use App\Providers\RouteServiceProvider;
use App\User;
use Illuminate\Foundation\Auth\RegistersUsers;
use Illuminate\Support\Facades\Hash;
use Illuminate\Support\Facades\Validator;

class RegisterController extends Controller
{
    /*
    |--------------------------------------------------------------------------
    | Register Controller
    |--------------------------------------------------------------------------
    |
    | This controller handles the registration of new users as well as their
    | validation and creation. By default this controller uses a trait to
    | provide this functionality without requiring any additional code.
    |
    */

    use RegistersUsers;

    /**
     * Where to redirect users after registration.
     *
     * @var string
     */
    protected $redirectTo = RouteServiceProvider::HOME;

    /**
     * Create a new controller instance.
     *
     * @return void
     */
    public function __construct()
    {
        $this->middleware('guest');
    }

    /**
     * Get a validator for an incoming registration request.
     *
     * @param  array  $data
     * @return \Illuminate\Contracts\Validation\Validator
     */
    protected function validator(array $data)
    {
        return Validator::make($data, [
            'name' => ['required', 'string', 'max:255'],
            'email' => ['required', 'string', 'email', 'max:255', 'unique:users'],
            'password' => ['required', 'string', 'min:8', 'confirmed'],
        ]);
    }

    /**
     * Create a new user instance after a valid registration.
     *
     * @param  array  $data
     * @return \App\User
     */
    protected function create(array $data)
    {
        return User::create([
            'name' => $data['name'],
            'email' => $data['email'],
            'password' => Hash::make($data['password']),
        ]);
    }
}- 在上面的程式碼裡面,我們能找到的都只有protected的method而已,但是程式當中又有一行use吸引到了我們注意
use RegistersUsers;- 接下來我們找到RegisterUsers,其他相關的程式就通通都在該檔案裡面了
<?php

namespace Illuminate\Foundation\Auth;

use Illuminate\Auth\Events\Registered;
use Illuminate\Http\Request;
use Illuminate\Http\Response;
use Illuminate\Support\Facades\Auth;

trait RegistersUsers
{
    use RedirectsUsers;

    /**
     * Show the application registration form.
     *
     * @return \Illuminate\Http\Response
     */
    public function showRegistrationForm()
    {
        return view('auth.register');
    }

    /**
     * Handle a registration request for the application.
     *
     * @param  \Illuminate\Http\Request  $request
     * @return \Illuminate\Http\Response
     */
    public function register(Request $request)
    {
        $this->validator($request->all())->validate();

        event(new Registered($user = $this->create($request->all())));

        $this->guard()->login($user);

        if ($response = $this->registered($request, $user)) {
            return $response;
        }

        return $request->wantsJson()
                    ? new Response('', 201)
                    : redirect($this->redirectPath());
    }

    /**
     * Get the guard to be used during registration.
     *
     * @return \Illuminate\Contracts\Auth\StatefulGuard
     */
    protected function guard()
    {
        return Auth::guard();
    }

    /**
     * The user has been registered.
     *
     * @param  \Illuminate\Http\Request  $request
     * @param  mixed  $user
     * @return mixed
     */
    protected function registered(Request $request, $user)
    {
        //
    }
}-
我們可以多採用Trait的方式,讓程式碼可以漸漸變的簡捷一些,甚至透過複寫來達到多型的目的
-
而另一種方式是透過Interface規範物件的對外接口,並且在需要使用時才註入該物件
<?php
interface IPay {

    /** 整理付款資訊 */
    public function pay(array $params) : RO

    /** 呼叫金流API */
    public function callApi(array $params) : RO

    /** 供金流API回叫使用 */
    public function callBack(array $params) : RO
}- 以上我們設定好了Interface的通用接口,而一般金流也大多是這三步驟,所以我們分別針對紅陽、藍新、綠界,依不同需求開發了三隻class
<?php

class Pay {
    public $red;
    public $green;
    public $blue;

    public function __construct() {
        $this->red = new Red;
        $this->green = new Green;
        $this->blue = new Blue;
    }

    public function pay() {
        $ro = $this->doPay($this->red);
        $ro = $this->doPay($this->green);
        $ro = $this->doPay($this->blue);
    }
    .
    .
    .
    protected function doPay(IPay $store) {
        $store->pay([]);
        $store->callApi([]);
        $store->callBack([]);
    }
}- 因為每隻class都是統一接口,所以我們可以直接依interface的規格來了解我們有那些method是對外可以被使用的
自動程式碼分析
- 透過以下Docker-Compose.yml生成一個SonarQube環境
version: '3.7'
services:
  sonarqube:
    image: sonarqube:community
    container_name: sonarqube
    volumes:
      - './sonarqube:/opt/sonarqube'
    ports:
      - '0.0.0.0:9000:9000'
    networks:
      server
networks:
  server:
driver: bridge- 透過以下指令將Docker內的設定檔備份出來
docker cp sonarqube:/opt/sonarqube ./- 修改./conf/sonar.properties,讓它可以連到PostgreSql資料庫
sonar.jdbc.username=[你的sonarqube資料庫帳號]
sonar.jdbc.password=[你的sonarqube資料庫密碼]
sonar.jdbc.url=jdbc:postgresql://[資料庫IP]/[資料庫名稱]?currentSchema=[資料庫schema]- 追加系統設定,不然Sonarqube裡面的Elasticsearch無法啟動
sysctl -w vm.max_map_count=262144-
進入SonarQube,http://localhost:9000
-
先Login,如果你沒修改過你的預設帳密,你的帳密應該會是如下
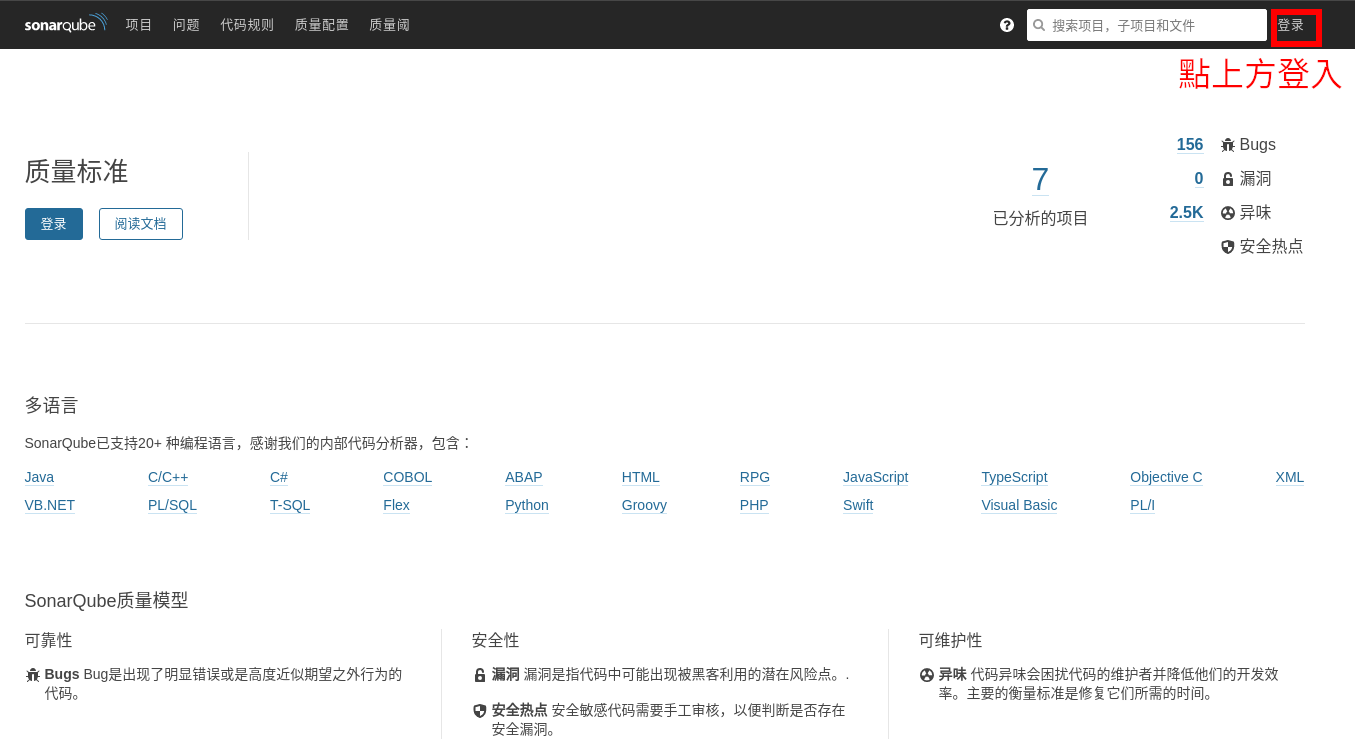
帳號: admin
密碼: admin
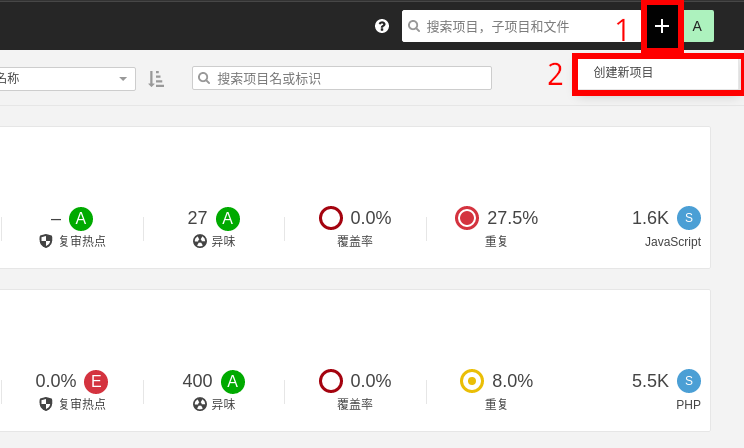
- 創立一個新項目
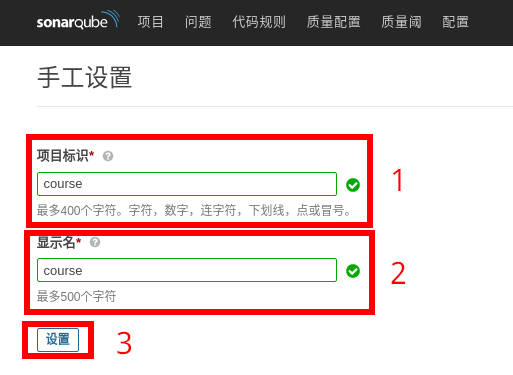
- 新增你的專案名稱
- 新增令牌
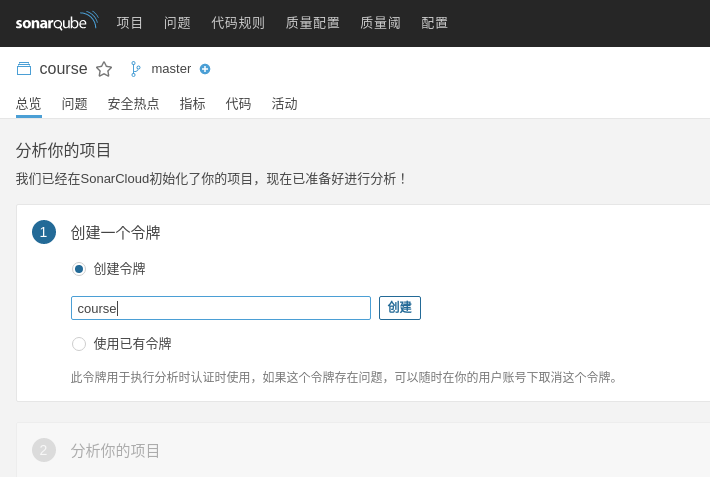
這裡令牌是用在程式呼叫時,取代User/Password用的,可以全部的專案都用同一個令牌,但我個人是比較習慣一個專案一個令牌,權限拆分開
你也可以進入 我的帳號
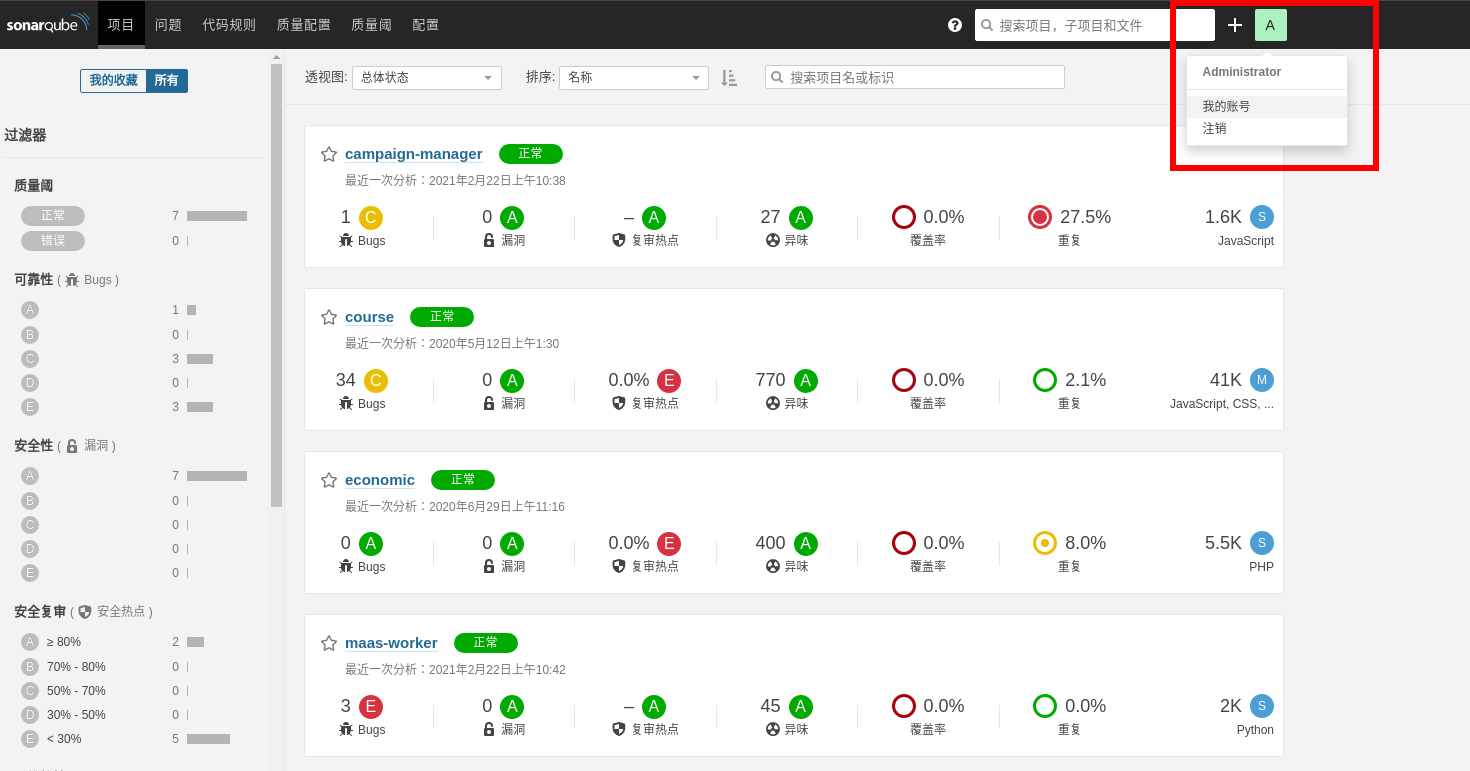
進入 安全
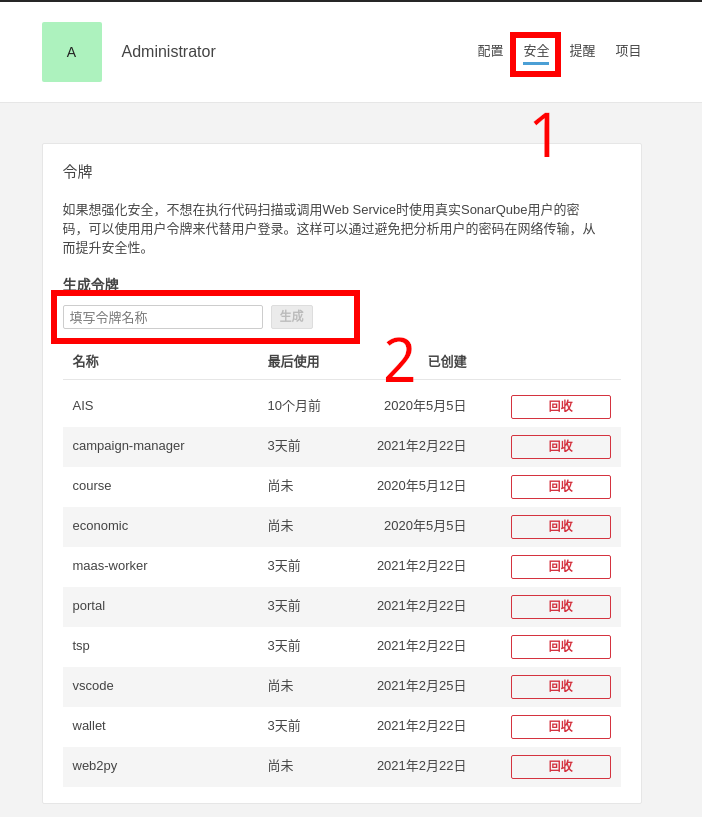
輸入你的token名字,並按下確定
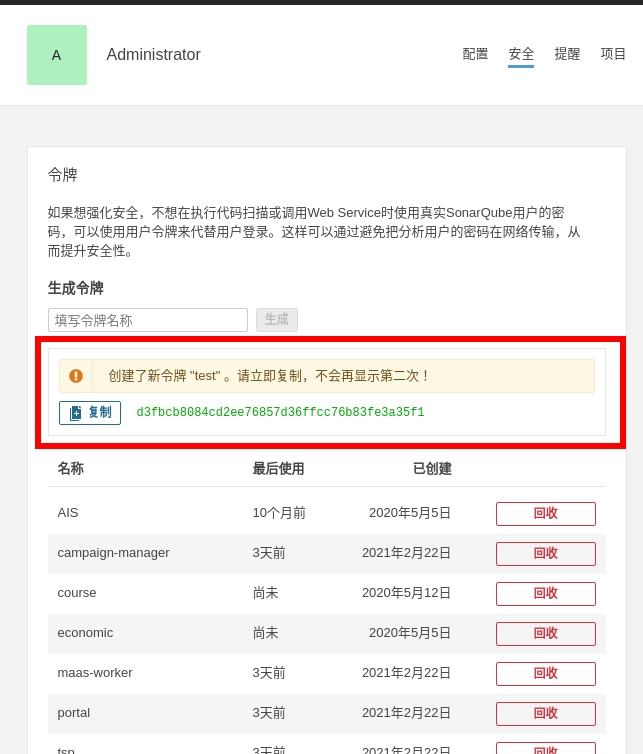
從你的token建立
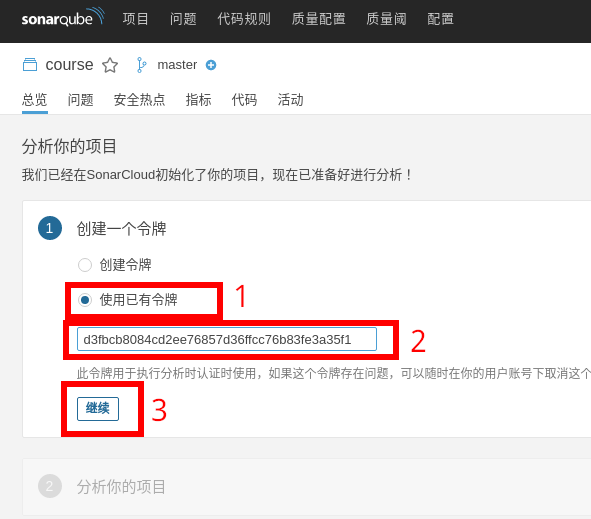
- 設定你的專案環境

-
新項目完成之後,它會有一個要你下載Scanner的連結
-
新增程式碼掃瞄設定檔,並存成course.properties
sonar.projectKey=course
sonar.projectName=course
sonar.language=php
sonar.projectVersion=1.0.0
sonar.host.url=http://[你的sonarqube主機IP]:9000
sonar.projectBaseDir=[你的course程式碼所在的位置]
sonar.sources=./
sonar.exclusions=**/vendor/**,**/storage/**
sonar.login=[你的user token]- 開啟shell,運行Scanner
sonar-scanner -Dproject.settings=[你的course.properties位置]- 掃完之後,可以進入網頁看結果
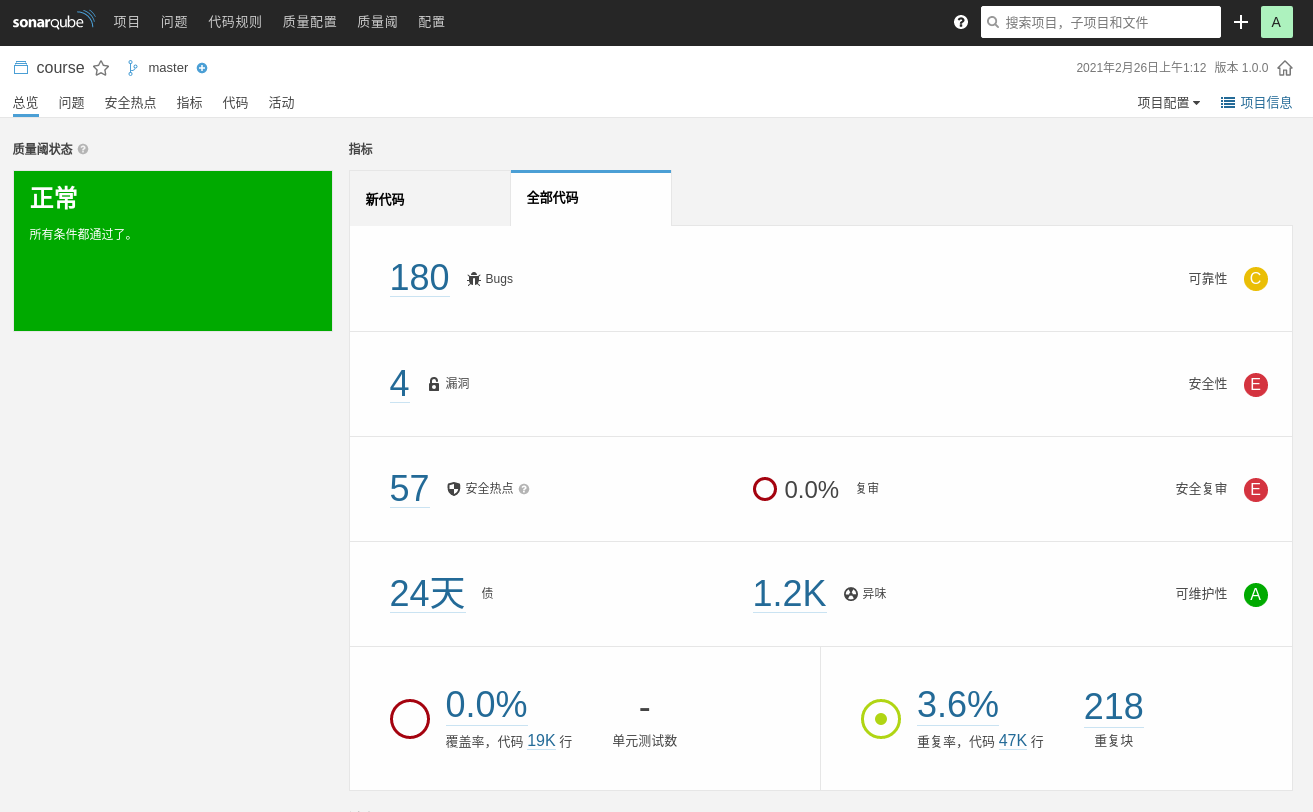
自動上版
-
透過此連結抓取上版工具
-
設定好development、test、production相關環境所需之參數
-
運行
ansible-playbook -i [你的主機設定,好比development、test、production] deploy.yml